

Welcome to the ultimate guide for creating and recording high-quality online course videos right from the comfort of your own home. With the rise of e-learning and the demand for online courses, it’s crucial to deliver an exceptional learning experience to your audience. One of the key factors in achieving this is by producing professional-quality videos that engage and educate your students. In this guide, we’ll explore the importance of high-quality online course videos and provide you with expert tips and techniques to help you record videos that truly stand out.
The Importance of High-Quality Online Course Videos
When it comes to online learning, video content has become the preferred medium for both instructors and students. Research shows that 72% of learners believe that video content improves their learning experience and understanding of course materials (source: Statista). By creating high-quality online course videos, you can:
- Enhance student engagement and comprehension
- Build credibility and professionalism
- Deliver complex concepts in a visually appealing manner
- Establish a connection and rapport with your audience
To achieve these benefits, let’s dive into the process of setting up your home recording studio and the essential equipment you’ll need.
Setting Up Your Home Recording Studio
Creating a dedicated space for recording your online course videos is essential for consistent quality and minimal distractions. Here are some steps to set up your home recording studio:
- Choose a quiet room: Select a room with minimal background noise and echo.
- Soundproof your space: Use acoustic panels or foam to reduce echo and external noises.
- Arrange your equipment: Set up your camera, lighting, and audio equipment in an organized and functional manner.
- Create a neutral backdrop: Use a clean and uncluttered background to maintain focus on the content.
- Eliminate distractions: Remove any objects or elements that may distract viewers from the main content.
Now that your studio is ready, let’s explore the essential equipment needed for recording professional-quality online course videos.
Essential Equipment for Recording Professional-Quality Videos
To achieve a high standard of video production, you’ll need the following equipment:
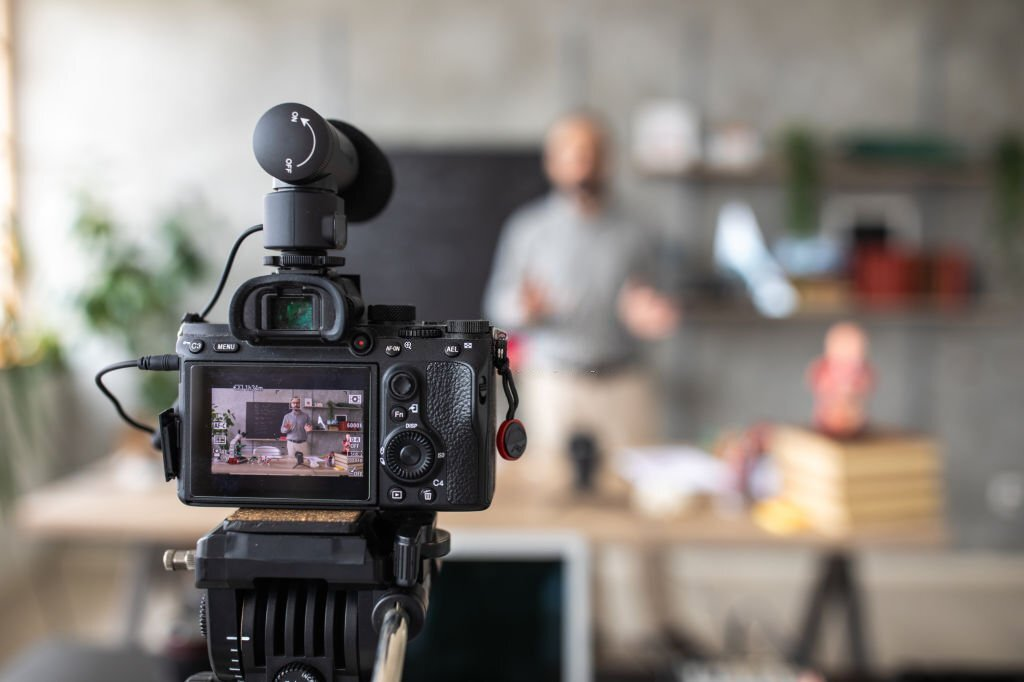
- Camera: Invest in a high-definition camera capable of capturing clear and crisp video footage. Consider options such as DSLRs, mirrorless cameras, or even a high-quality smartphone camera.
- Lighting: Proper lighting is crucial for well-lit and visually appealing videos. Use softboxes, ring lights, or natural lighting to illuminate your recording space.
- Microphone: Invest in a quality microphone to ensure clear and professional audio. Options include USB microphones, lapel microphones, or shotgun microphones.
- Tripod or stabilizer: Use a tripod or stabilizer to keep your camera steady and avoid shaky footage.
With the right equipment in place, let’s explore some techniques to optimize your lighting for optimal video quality.
Lighting Techniques for Optimal Video Quality
Proper lighting is essential for creating visually appealing videos. Consider the following lighting techniques:
- Three-point lighting: Use a three-point lighting setup with key, fill, and backlight sources to evenly illuminate your face and eliminate harsh shadows.
- Diffuse lighting: Soften the lighting by using diffusion materials or softboxes to create a more flattering and even lighting effect.
- Natural lighting: If possible, leverage natural light by positioning yourself near a window. However, be mindful of inconsistent lighting conditions throughout the day.
Now that you have a well-lit recording space, let’s explore choosing the right camera for your online course videos.
Choosing the Right Camera for Online Course Videos
The camera you choose plays a significant role in the overall quality of your online course videos. Consider the following factors when selecting a camera:
- Resolution: Opt for a camera that supports at least 1080p resolution for crisp and detailed video footage.
- Autofocus: Choose a camera with reliable autofocus capabilities to ensure that you remain in focus throughout your recordings.
- Low-light performance: Look for a camera with good low-light performance to maintain video quality even in dimly lit environments.
- Connectivity: Consider cameras with HDMI or USB outputs for easy connectivity to your recording setup.
With your camera chosen, let’s move on to audio tips for clear and professional audio recording.
Audio Tips for Clear and Professional Audio Recording
Crystal-clear audio is vital for a high-quality learning experience. Follow these tips for optimal audio recording:
- Use a quality microphone: Invest in a good microphone to capture clear and professional audio.
- Position the microphone: Place the microphone close to your mouth to capture your voice clearly and minimize background noise.
- Reduce echo: Use acoustic treatments in your recording space to minimize echo and reverberation.
- Monitor audio levels: Keep an eye on audio levels to ensure that your voice is neither too soft nor distorted.
Now that you’re ready with your equipment and setup, let’s discuss scripting and preparing for your online course videos.
Scripting and Preparing for Your Online Course Videos

While it’s essential to maintain a natural and conversational tone in your videos, having a well-thought-out script helps you deliver content more effectively. Here are some tips for scripting and preparing:
- Outline your content: Create a detailed outline of the topics you want to cover in your course.
- Write a script: Use the outline to write a script that guides you through the video, ensuring you cover all the key points.
- Practice: Familiarize yourself with the script and practice delivering it naturally before recording.
- Be concise: Keep your videos focused and concise to maintain student engagement and retention.
With your script in hand, it’s time to move on to filming and editing your online course videos.
Filming and Editing Your Online Course Videos
When it comes to filming and editing your online course videos, follow these best practices:
- Frame your shots: Position yourself in the frame, ensuring that you’re well-centered and easily visible.
- Record in segments: Break your content into shorter segments or chapters to make editing and organizing more manageable.
- Review and retake: Take the time to review your footage and retake any sections that require improvement.
- Edit with precision: Use video editing software to remove mistakes, enhance visuals, and add relevant graphics or captions.
Now that your videos are recorded and edited, let’s discuss optimizing video file sizes for fast streaming.
Optimizing Video File Sizes for Fast Streaming
Large video file sizes can negatively impact streaming speed and user experience. Consider the following tips to optimize your video file sizes:
- Choose the right format: Select a video format that balances quality and file size, such as H.264 or HEVC.
- Adjust resolution and bitrate: Optimize your video resolution and bitrate settings to reduce file sizes without compromising quality.
- Utilize compression: Compress your videos using video compression software or online tools to further reduce file sizes.
Now that your videos are ready to be shared, let’s explore uploading and hosting your online course videos.
Uploading and Hosting Your Online Course Videos
When it comes to uploading and hosting your online course videos, Cosmofeed offers a seamless solution. With Cosmofeed’s Courses feature, you can easily create and sell online courses to your audience. Cosmofeed Courses provides the following benefits:
- Course creation: Create courses with videos, materials, and handouts to deliver a comprehensive learning experience.
- Pricing control: Set your own price for your courses, giving you the flexibility to monetize your expertise.
- Affiliation enablement: Enable affiliation on your courses, allowing affiliates to resell your course and earn a commission.
- Personalized landing page: Get a personalized landing page for selling your courses within minutes, enhancing your course’s visibility and professionalism.
With your videos uploaded and hosted, it’s time to focus on promoting your online course using high-quality videos.
Promoting Your Online Course with High-Quality Videos
High-quality videos not only enhance the learning experience but also serve as powerful marketing tools to promote your online course. Consider the following strategies:
- Create a course trailer: Develop a short and captivating trailer for your course to generate excitement and interest.
- Share preview videos: Release snippets or preview videos from your course to entice potential students and showcase the value of your content.
- Utilize social media platforms: Leverage platforms like YouTube, Instagram, and LinkedIn to share your videos and reach a wider audience.
- Collaborate with influencers: Partner with influencers or industry experts who can promote your course through their channels.
By effectively promoting your online course with high-quality videos, you can attract more students and increase your course’s success.
Conclusion
Creating and recording professional-quality online course videos is a crucial step in delivering an exceptional learning experience. By following the tips and techniques outlined in this guide, you can produce engaging, informative, and visually appealing videos that captivate your audience. Remember to set up your home recording studio, invest in essential equipment, optimize lighting and audio, script and prepare your content, film and edit with precision, and optimize video file sizes. Finally, with Cosmofeed’s Courses feature, you can easily create, sell, and promote your online courses, ensuring a seamless learning journey for your students. Now, go ahead and unleash your creativity to create outstanding online course videos!