

Explore Instagram’s latest updates, including AI stickers and Broadcast Channels, and get a comprehensive tutorial on effectively utilizing each of these features.
Instagram is a rapidly evolving social media platform. Remember when Instagram was primarily used for sharing highly saturated images of your meals (shoutout to the Lo-Fi filter)? Now, this social network offers a multitude of features, such as broadcasting to your followers and crafting your own AI-powered stickers. Many of these new features have been introduced to the Meta-owned app in recent months.
While sticking to tried-and-true photo and video sharing is perfectly fine, we would encourage you to step out of your comfort zone. Instagram’s algorithm favours early adopters of its latest features.
Embracing these features can help you connect with previously untapped segments of your audience or re-engage with your followers. For instance, updates made in Notes now appear at the top of your followers’ inboxes, but we’ll delve into that in a moment.
Now, let’s do a breakdown of Instagram’s most recent features and offer a step-by-step guide on how to use them.
Broadcast Channels
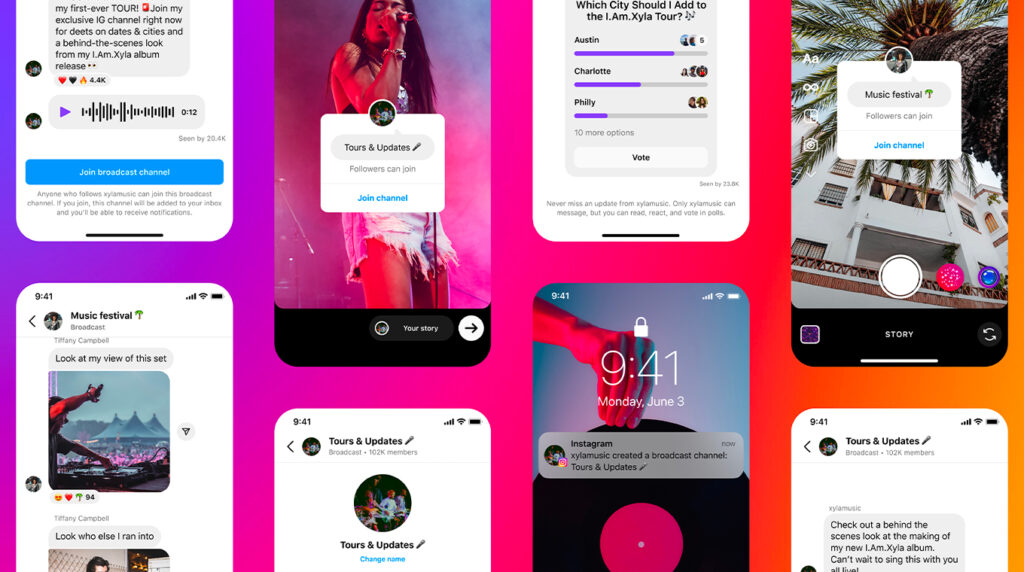
Broadcast Channels, in particular, have gained significant popularity among creators and brand accounts on Instagram, and for good reason. These channels, introduced in February 2023, allow you to send mass updates to followers who have chosen to join them.
By creating a Broadcast Channel (currently available only to Instagram Creator account holders), you can share text, photos, videos, voice notes, and even polls with your channel members. Broadcast Channels provide a unique way to communicate important launches, significant announcements, company updates, or simply foster a deeper connection with your followers.
A notable example of this would be, how the trainers associated with the Sweat app used Broadcast Channels to help users stay committed to their 12-week challenge. They established a Broadcast Channel for each program and trainer, sending encouraging messages, voice notes, videos, and interactive polls to engage their audience.
Here are rephrased instructions for creating an Instagram Broadcast Channel and an Instagram Collab post:
Creating an Instagram Broadcast Channel:
- Launch the Instagram app and locate the message icon in the top right corner.
- Tap the new message icon also found at the top right.
- Select ‘Create broadcast channel.’ At this point, you can enter a channel name, define your target audience, set an end date, and choose whether to display the channel on your profile.
- After configuring your settings, tap ‘Create broadcast channel’ at the bottom. Your chosen audience will receive invitations to join the channel, and they can accept to participate.
Collaborating on Instagram Posts with Multiple Friends
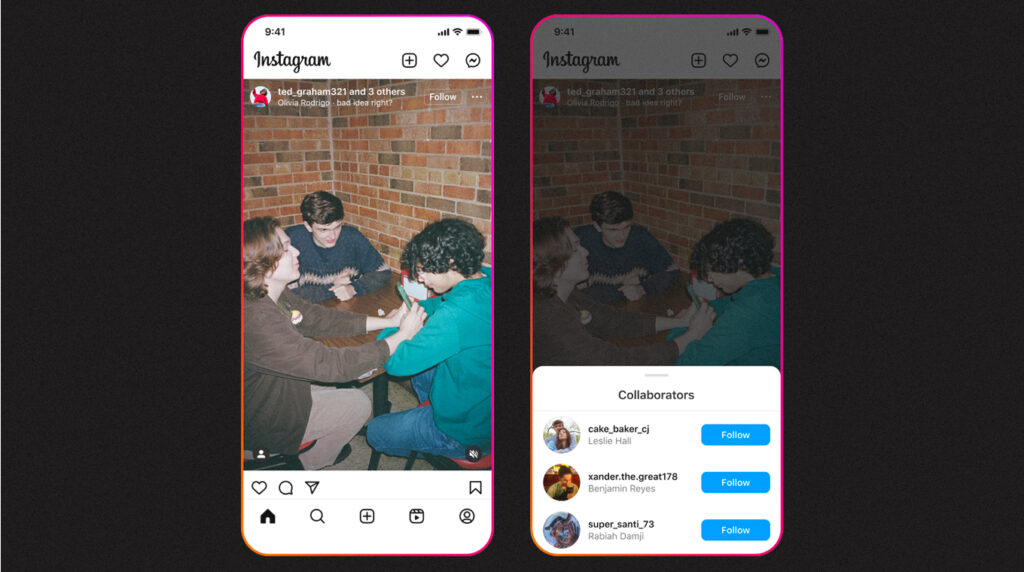
Collaborating on Instagram posts is a feature that initially became available in 2021, enabling two accounts to partner on a post. Now, Instagram allows you to invite up to three friends to co-author a feed post, carousel, or Reel.
This feature has the advantage of making your content visible to the followers of all your collaborators. The post will also be displayed on the profile grids of all collaborators, and any engagement on the post will be shared across all participating accounts.
For a more detailed guide on Instagram collab posts, you can refer to our in-depth tutorial. Here’s a high-level summary of how to create an Instagram Collab post:
Creating an Instagram Collab Post:
- Open the Instagram app and tap the Create (+) icon located at the bottom.
- Choose the photo or Reel you wish to upload.
- In the final editing screen before posting (where you enter your caption), tap ‘Tag people,’ and then select ‘Invite collaborators.’
- Search for the users you want to collaborate with, tap their names to choose them, and finally, tap ‘Done’ in the top right corner.
- Remember to craft your caption, include a location, and make any necessary additions before you proceed to publish. When you’re prepared, click on the “Share” button. Invitations to participate in the post will be sent to your collaborators.
- Upon their acceptance of the invitation, the post will be visible on the grids and feeds of both accounts.
Desktop Access to Instagram Insights
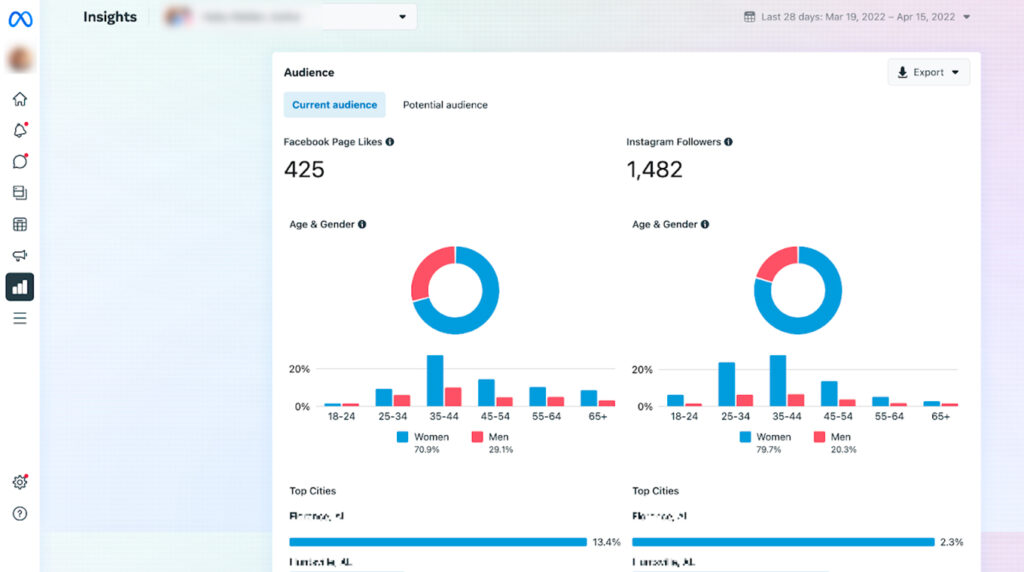
In a move that benefits social media managers, Instagram Insights, the platform’s analytics tool, is now accessible on desktop computers.
To access Instagram Insights on your computer:
- Visit your Instagram profile using your preferred desktop web browser. Just below your bio, a brief summary of your recent reach will be displayed. Click on the ‘View Insights’ link located next to it.
- Now you’re in! Within the desktop version of Insights, you’ll discover a comprehensive overview of your Reach, Engagement, and more. At the top of the screen, you can easily switch between specific time frames, ranging from seven to 90 days.
Meta Verification

While this feature is not exclusive to Instagram, it represents a significant shift for brands and content creators using the platform, making it deserving of mention here.
Obtaining verification on Instagram is by no means a new concept; that iconic blue checkmark has been a fixture for nearly as long as the beloved Lo-Fi filter. However, Meta has introduced an entirely new avenue to attain this status.
With the debut of Meta Verification in 2023, Instagram accounts are no longer restricted to notable public figures for that coveted checkmark. Subscribers now have the option to pay a monthly fee to gain verification on Instagram (and its sibling platform, Facebook). Furthermore, they gain access to a range of premium features, including enhanced support, account security, and personalized stickers.
To enroll in Meta Verification on Instagram, follow these steps:
- Access your Instagram profile by tapping your profile picture at the bottom right of the app.
- Tap the hamburger menu, represented by the three lines at the top right.
- Select ‘Meta Verified.’
- Review the explanation, and then proceed by tapping ‘Next.’
- Select the Meta accounts you wish to verify.
- Confirm your selection and make the payment. Your monthly subscription fee will be charged regularly unless cancelled. Please note that it may take up to 48 hours for the blue verification badge and associated benefits to become visible.]
Music in Carousel Posts
While the option to include music in regular Instagram photo posts has been available for some months, Instagram has recently extended this feature to include carousel posts with multiple photos.
Here’s how to incorporate music into your carousel posts:
- Start by tapping the Create (+) icon at the bottom of your Instagram app, just like you would for a standard post.
- Beneath your photo preview, on the right, tap the carousel icon. Select the photos you wish to include in the carousel and then tap ‘Next’ in the top right corner.
- After choosing your desired filters, tap ‘Next’ once more.
- Now, on the final editing screen, you can add a song by selecting ‘Add music.’
- Browse through the song list or use the search function to find your preferred track. Tap on it to select.
- To determine the duration of the song, tap the ’30’ icon. Swipe the audio bar on the bottom left or right to choose the segment you want to play. When satisfied, tap ‘Done.’
- Don’t forget to compose your caption, include a location, tag friends, and make any other necessary additions before sharing. When you’re ready, click ‘Share.’
How to post a Note on Instagram
- Open your Instagram app and tap the message icon located at the top right.
- Select the speech bubble situated just above your profile picture.
- You can add text by typing within the bubble, or enhance your Note with music by tapping the music icon below your photo and choosing a song. You can include both text and music if you prefer.
- To share your Note, tap ‘Share’ at the top right corner.
Reels Templates
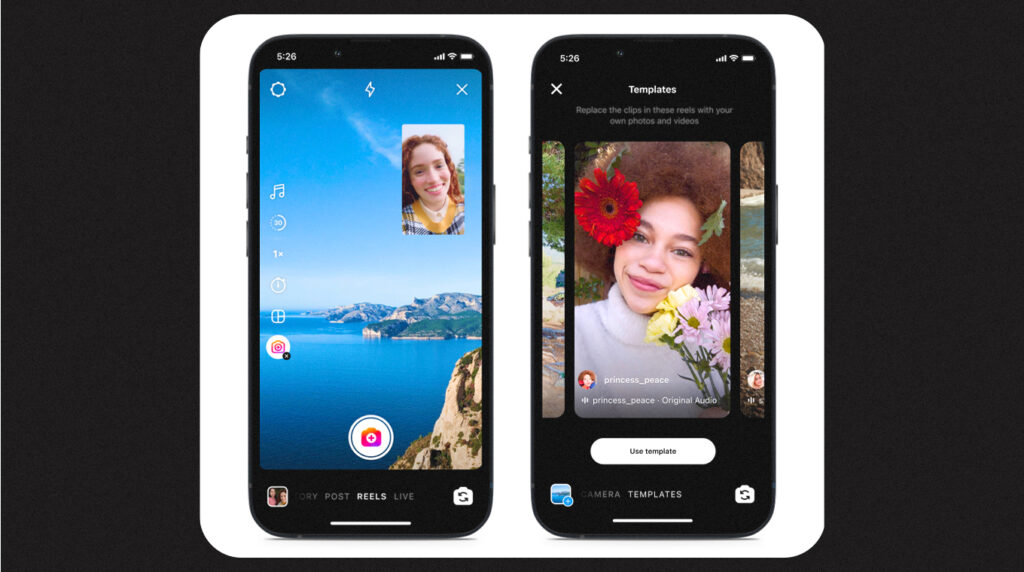
Video editing has become significantly more accessible, but the hassle of editing and fine-tuning clips on your phone remains a pain, no matter how experienced you are.
Enter Reels templates. This feature has been around for a while, but Instagram recently revamped the process to make templates much more user-friendly.
With this Instagram innovation, you can essentially adopt another Instagram user’s edit, replacing their clips or photos with your own. This is especially beneficial for those skilled Instagram creators who have perfected their video and music synchronisation!
Not all Reels on Instagram are available as templates (the creator must enable an advanced setting for this). On Reels that can be used as a template, you’ll notice a button that says ‘Use Template’ just above the original creator’s name on the left side of the app.
Here’s how to find and create Reels with templates:
Discovering Reels Templates:
- Tap the create (+) button in the Instagram app, then select ‘REEL’ at the bottom of the screen.
- Choose ‘Templates’ at the top of the screen.
- In this section, you’ll find a library of Reels available as templates for your next video. It includes recommended options and trending Reels. Select your desired Reel, and follow the steps outlined in the next section.
- Keep an eye out for Reel templates you like on the Reels or Explore pages.
Creating a Video with a Reel Template:
- Once you’ve found a Reel template you like, tap the ‘Use as Template’ button.
- Click on one of the clip placeholders to insert your photos or videos, then tap ‘Next.’
- From there, you can either publish your new Reel as is (tap ‘Next’ again) or use the ‘Edit video’ button at the bottom left for adjustments.
- If you choose to edit the video, you’ll be taken to the regular Reels editing dashboard. Here, you can modify clip timings, music, transitions, and add more photos, videos, text, and stickers. When you’re satisfied with your version, tap the blue arrow on the right side of the screen.
- This is the final editing screen before posting. You can craft your caption, change the video cover, tag people, add location or a paid partnership label, and more.
- It’s also where you can decide whether your Reel can be used as a template by others. Scroll to the bottom to access ‘Advanced settings.’
- Toggle ‘Don’t let others use this reel as a template’ on or off.
- Ready to share your Reel with the world? Tap ‘Share.’
Stickers
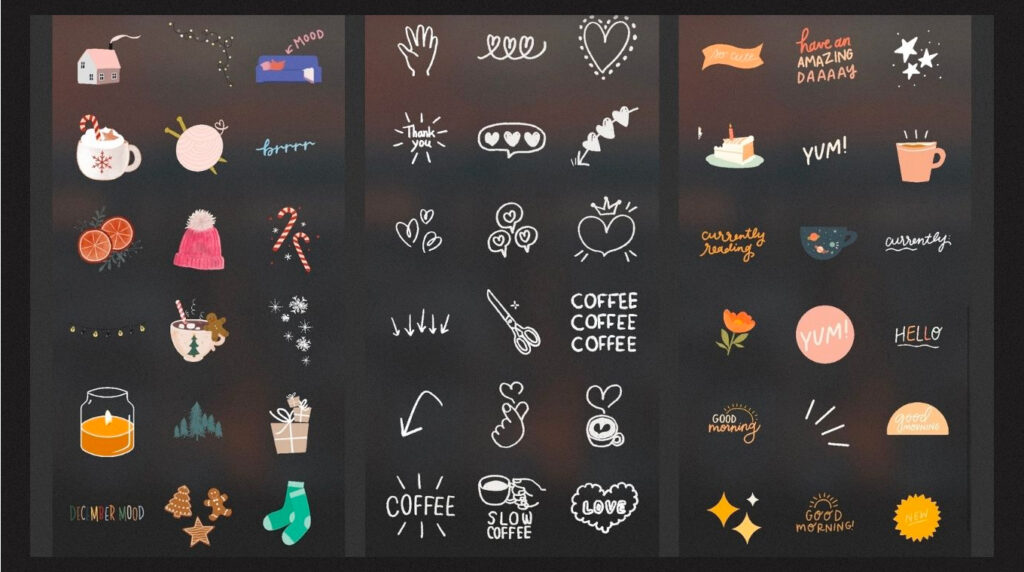
Instagram is putting a strong emphasis on stickers this year, introducing not one but two methods to craft your personalised stickers in Stories and messages.
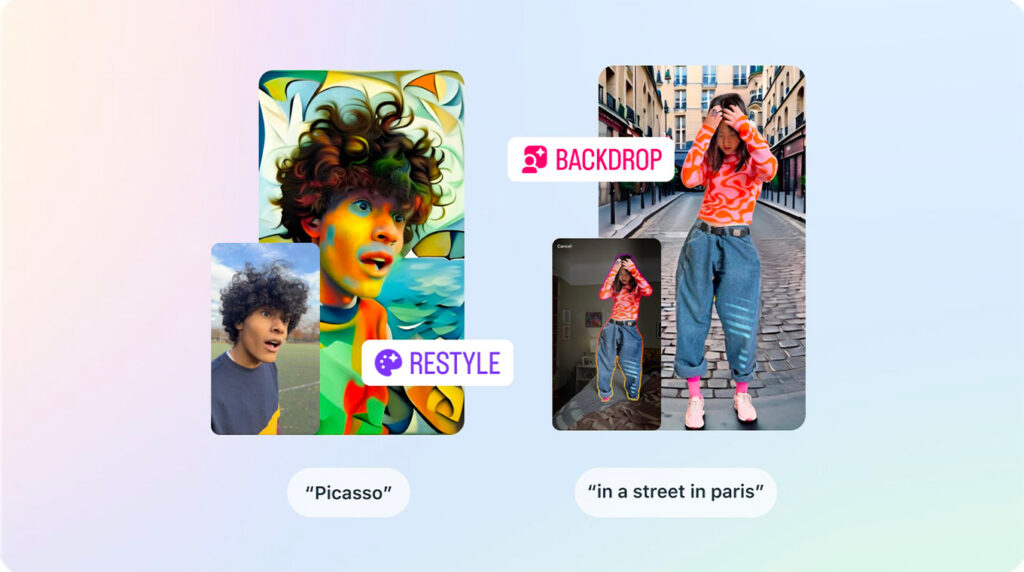
AI-Powered Stickers

Whether you’re searching for a sticker to suit a specific situation or just something playful, AI stickers can be a lot of fun.
For instance, when I requested a sticker to inform my husband to stop sending me distracting Reels while I was working on this article, the result was a rather perplexing yet endearing sea monster (though, I must admit, it was a poor prompt). More straightforward prompts, like the one from Buffer Content Writer Tami Oladipo at the bottom of this section, yield much better results. These stickers provide a delightful way to enliven your messages and infuse your Stories with character.
To send an AI sticker on Instagram via DMs:
- Click on the messages icon at the top right of the app to access your inbox and locate the person you wish to send the sticker to (You can also do this by responding to one of their Stories by tapping the ‘Message’ button when viewing their Instagram profile).
- Tap the ‘+’ icon at the bottom right and select ‘Stickers.’
- Enter a text prompt in the search bar, and your AI stickers will be displayed below.
- Tap an AI sticker to send it in your chat. Please note that if you send an AI sticker, the people in the chat will also see the text prompt you entered.
To include an AI sticker in an Instagram Story:
- Tap the Create (+) icon at the bottom of your Instagram app (or tap the blue + next to your profile in the Stories bar).
- Capture a photo or video or choose one from your camera roll.
- Tap the stickers icon (the square with a smiley face), then choose ‘AI STICKERS.’
- Enter a text prompt and tap ‘Generate.’
- Tap an AI sticker to add it to your story.
Photo Stickers
For those seeking truly unique additions to their Stories, Instagram now allows you to transform your own photos into stickers.
Creating a photo sticker in Instagram Stories:
- Tap the Create (+) icon at the bottom of your Instagram app (or tap the blue + next to your profile in the Stories bar).
- Capture a photo or video or select one from your camera roll.
- Tap the stickers icon (the square with a smiley face), then click the ‘Create’ icon (in the menu that appears, you’ll see all the stickers you’ve previously created).
- Choose a photo from your camera roll that you’d like to convert into a sticker.
- Instagram will automatically outline the best part of the photo for use, but you can select your own by tapping the ‘Select manually’ button at the bottom left. Once you’re satisfied, tap ‘Use sticker.’